Creating a custom Microsoft OAuth application
Step-by-step instructions below closely follow Microsoft documentation to create a new application for ngrok within the Azure portal.Register an application
- Sign-in to the Azure portal then select or create a tenant for your application.
- Search for “Microsoft Entra ID” and select it.
- Select “App registrations” on the left hand navigation.
- Select “New registration” at the top.
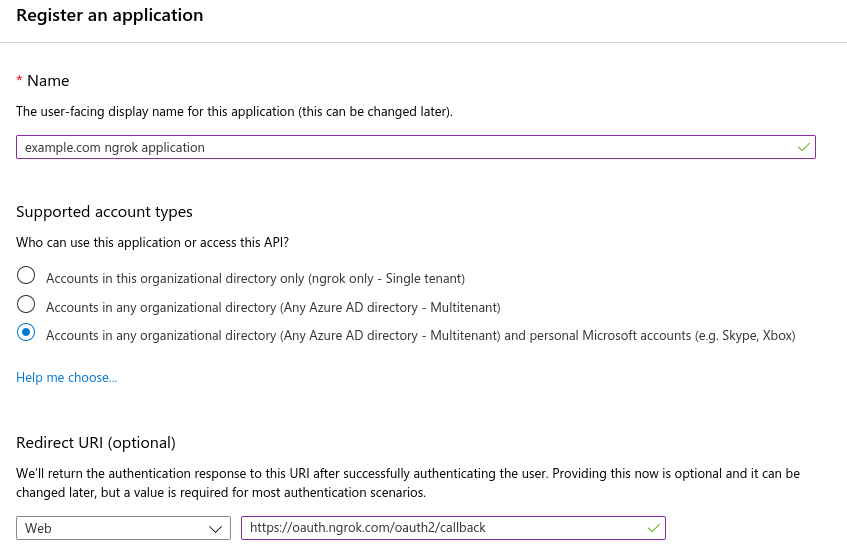
- Enter a name for your application.
- ngrok does not support single tenant applications. Choose supported account types from:
- Accounts in any organizational directory (Any Microsoft Entra directory - Multitenant)
- Accounts in any organizational directory (Any Microsoft Entra directory - Multitenant) and personal Microsoft accounts (for example, Skype, Xbox)
- Choose a “Web” redirect URI and enter
https://idp.ngrok.com/oauth2/callback. - Register your application. The final form should resemble:

Configure your application
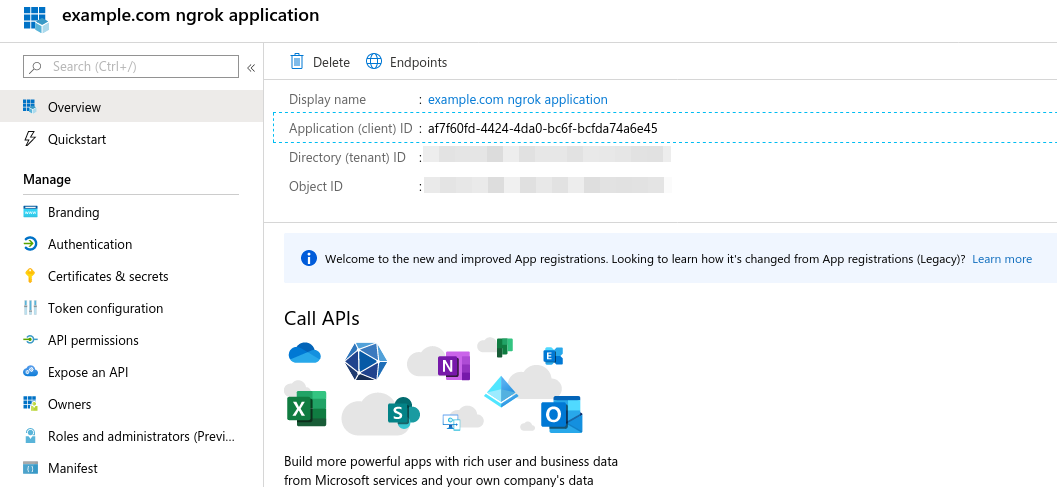
- When viewing your application, choose “Overview” on the left hand navigation.
- Store the “Application (client) ID” in the top information section for later.

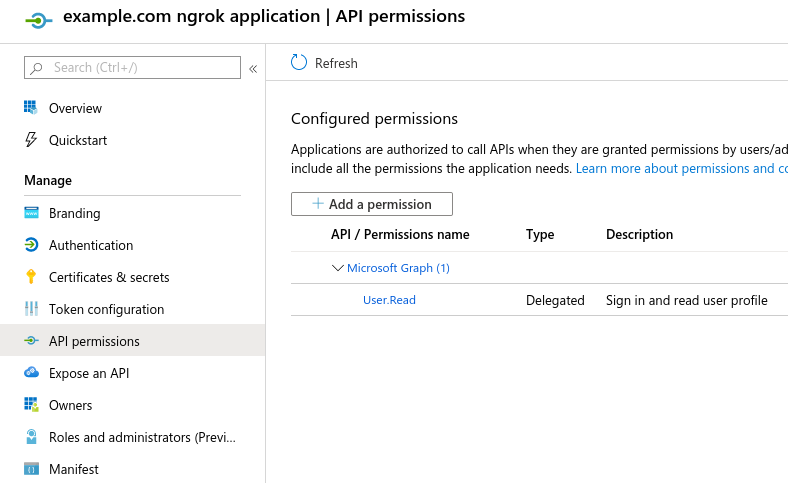
- Select “API permissions” on the left hand navigation.
- Add additional scopes that your application requires and store them for later.
- Scopes which require an application review by Microsoft are unsupported.
- Scopes that require admin consent prevent tenants’ users from authorizing until consent is granted.
- Ensure
User.Reador a more permissive scope (for example,User.Read.All) is configured for ngrok. Example minimal configuration:
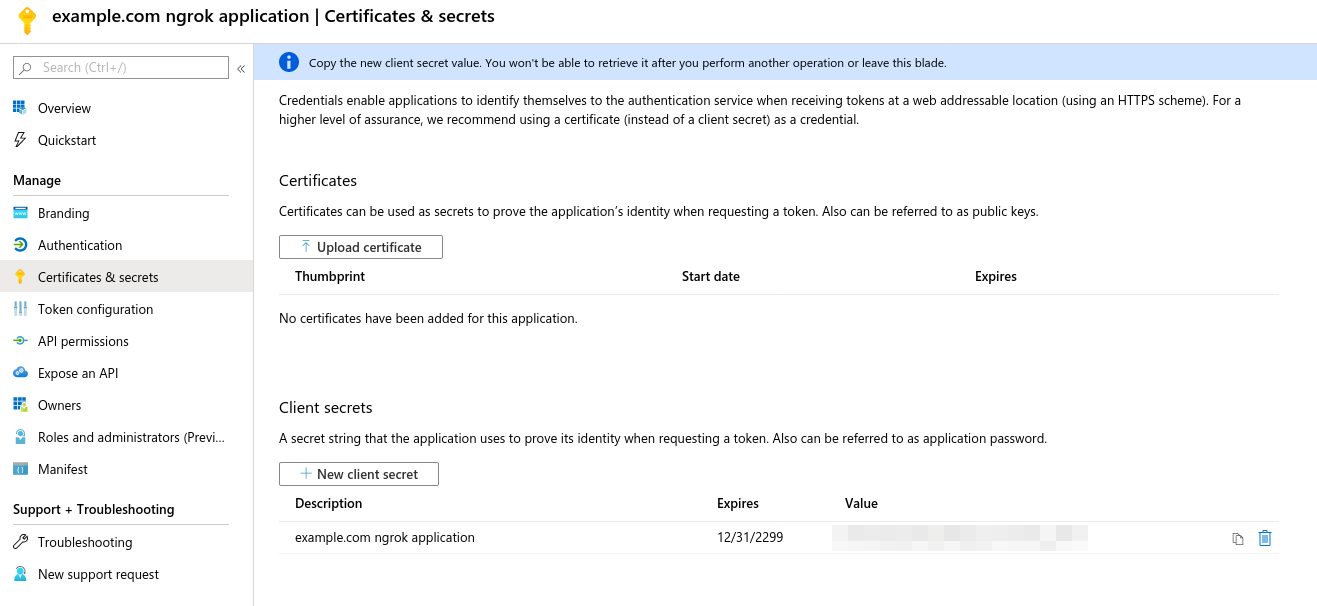
- Choose “Certificates and Secrets” on the left hand navigation.
- Select “New Client Secret” at the bottom, name the secret, set an expiration, and hit create.
- Creation is asynchronous. When complete, save the secret from the “Value” column (blurred below) for later:

Update your ngrok endpoint Traffic Policy
- Access the ngrok Dashboard Endpoints page and locate an existing endpoint you’d like to add this to or create a new one.
- In your traffic policy, add the following configuration:
You may add any scopes that are required by your application with the following caveats.
- Scopes which require a Facebook app review are unsupported.
- ngrok will enforce that users accept all permissions before completing authorization.
Configure access control
Optionally, configure access control to your service by only allowing specific users or domains.- By Email
- By Name
Additional application setup information
- Creating a Microsoft Entra ID tenant
- Permissions and consent (restricted permissions)
- Graph API User object properties (id, displayName, and mail/userPrincipalName)